
Heat Meter Installation Diagram
Heat meters are usually installed on the heating return line. Before starting installation, make sure the correct installation instructions from the meter’s technical catalog are followed. Correct installation ensures the meter works correctly.
more efficient tomorrows
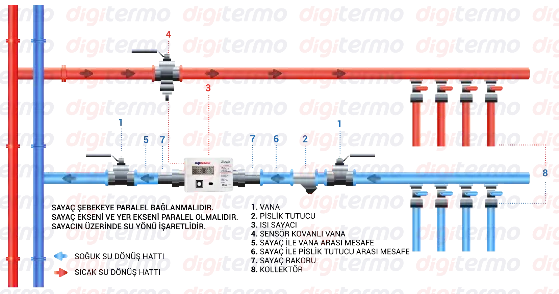
Important information for heat meter installation
Heat meters are usually installed on the heating return line. Before starting installation, make sure the correct installation instructions from the meter’s technical catalog are followed. Correct installation ensures the meter works correctly.
Every heat meter has 2 temperature sensors. One comes mounted in the meter body, while the other is supplied ready for installation. As shown in the diagrams, this sensor must be fitted into the thermocouple valve on the apartment’s supply line. It is important that the sensor is in contact with the water, because fixing it to the pipe surface may not give an accurate measurement.
Check that the sensor cables are intact. Broken or deformed cables can prevent the meter from working correctly.
Meter unions must be connected to the inlet and outlet of the heat meter. This is important so that the meter can be replaced easily.
There is an arrow on the lower body of the heat meter showing the connection direction. The arrow must point in the direction of the water leaving the apartment.
A common mistake during installation is to install according to the colour of the manifold. If the installer has connected the manifolds incorrectly, the whole system may be reversed. To avoid this, check the direction of the manifolds first and then connect the heat meter.